In perspective drawing, every set of parallel lines has its own vanishing point. When viewing things in two-point perspective, we arrange them (or ourselves) so that we are looking at one corner, with two sets of parallel lines (the horizontals on the front and one side) are moving away from us, at an angle to a vanishing point. The remaining set of parallel lines, the verticals, are still straight up-and-down.

Here's a photograph of a box on a table. As with the one-point example, the line across the back is not the horizon line - it's the edge of the table, and is lower than my eye level, and so, lower than the horizon. If we continue the lines made by the edges of the box, they meet at two points above the table - at eye level.
Note the extra space I've had to add around the image to fit the vanishing points on the page - when you draw two-point perspective, close vanishing points make your image look compressed, as though through a wide-angle lens. For best results, use an extra-long ruler, and use wide paper from a roll, or tape extra sheets to each side. (You can also tape your drawing to the table, and place your vanishing points on a piece of tape placed out to the side.)

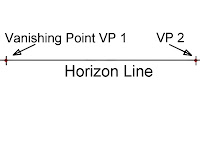
Let's draw a simple box using two-point perspective. First, draw a horizon line about one-third down your page. Place your vanishing points on the edges of your paper using a small dot or line.
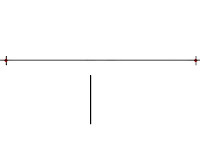
Now draw the front corner edge of your box, just a simple short line like this, leaving a space below the horizon line. Don't put it too close, or you'll end up with corners that are tricky to draw.
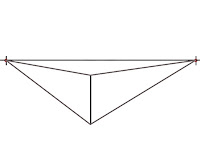
Now draw a line from each end of the line to both vanishing points, like this. Make sure they are straight, touch the very end of the line, and finish exactly at the vanishing point.
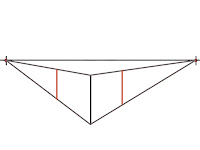
Now we complete the visible sides of the box by drawing the corners, shown here with red lines. Draw yours likewise, making sure they are nice and square, at perfect right angles to the horizon line. Not even a hint of a tilt!
This is the tricky part. Drawing the back, hidden sides of the box. You need to draw two sets of vanishing lines. One set goes from the right-hand corner line (top and bottom) to the LEFT VP (VP1). Another set goes from the left-hand corner line to the RIGHT VP (VP2). They cross over.
Make sure you don't try to make any lines meet, don't draw lines to any other corners, and don't worry about any of the other lines they might pass through. Just draw straight from the end of each back line to its opposing VP, as in the example above.
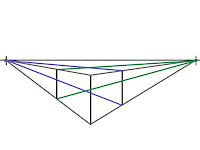
Now you simply have to draw a vertical line from the where the lower two vanishing lines cross, to the intersection of the upper two lines - the red line in the example. Sometimes this can be tricky - the slightest of errors can make them a little off center. If this happens, either start again making your drawing more accurate, or make a 'best fit', keeping your line vertical and fitting it between the corners as best you can. Don't just join the corners with a tilted line, as that will make the box misshapen.
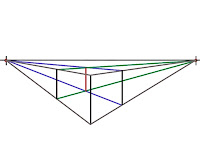
Finish off your two-point perspective box by erasing the excess vanishing lines. You can erase the lines of the box that would be hidden by they closer sides, or leave them visible if it is transparent. In this example, the top of the box is open, so you can see part of the back corner.
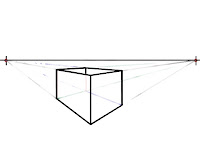
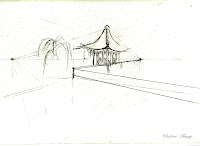
Here are a few more two point perspective examples. The steps are just the same as before, but the results look a little different depending on where you draw them.
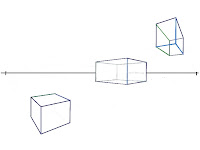
My study of Two Point Perspective at the Huntington Library

No comments:
Post a Comment